DocStash
DocStash | Base Application
How To Setup DocStash
Set Default Value
After the installation of DocStash is completed, you will need to set it up. To set up DocStash, you will need administrator rights in your Business Central.
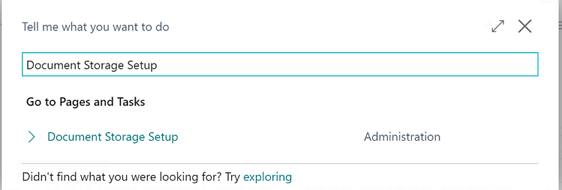
Go in the Admin Center or type in the search bar "DocStash Setup" to open the setup page.
First, start by pressing on the button "Set Default Value".
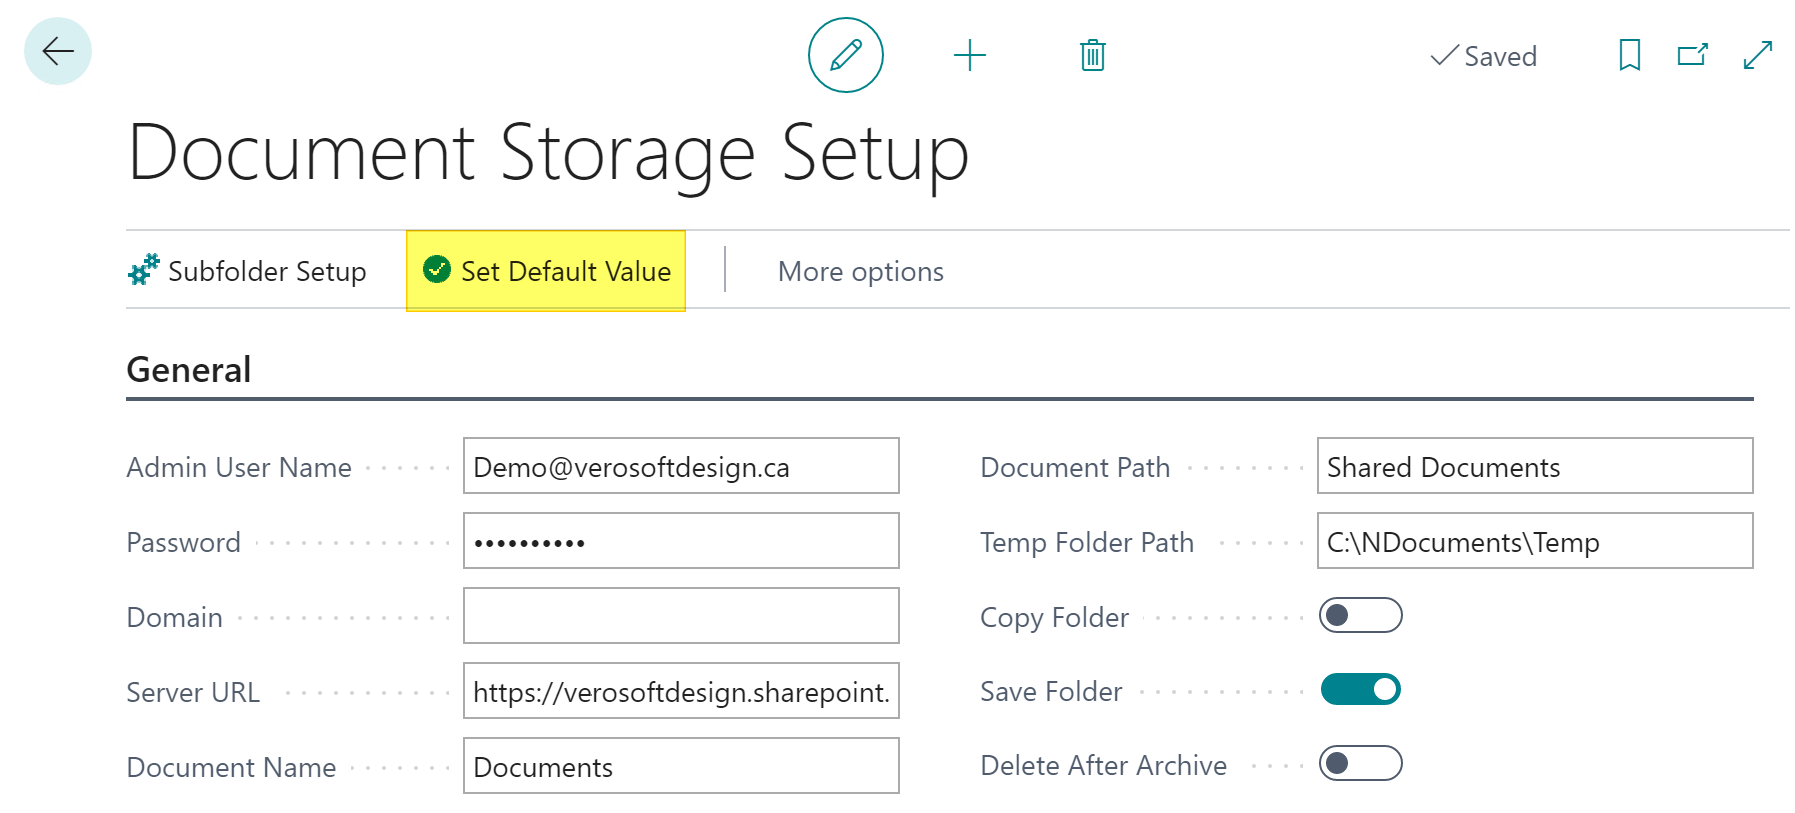
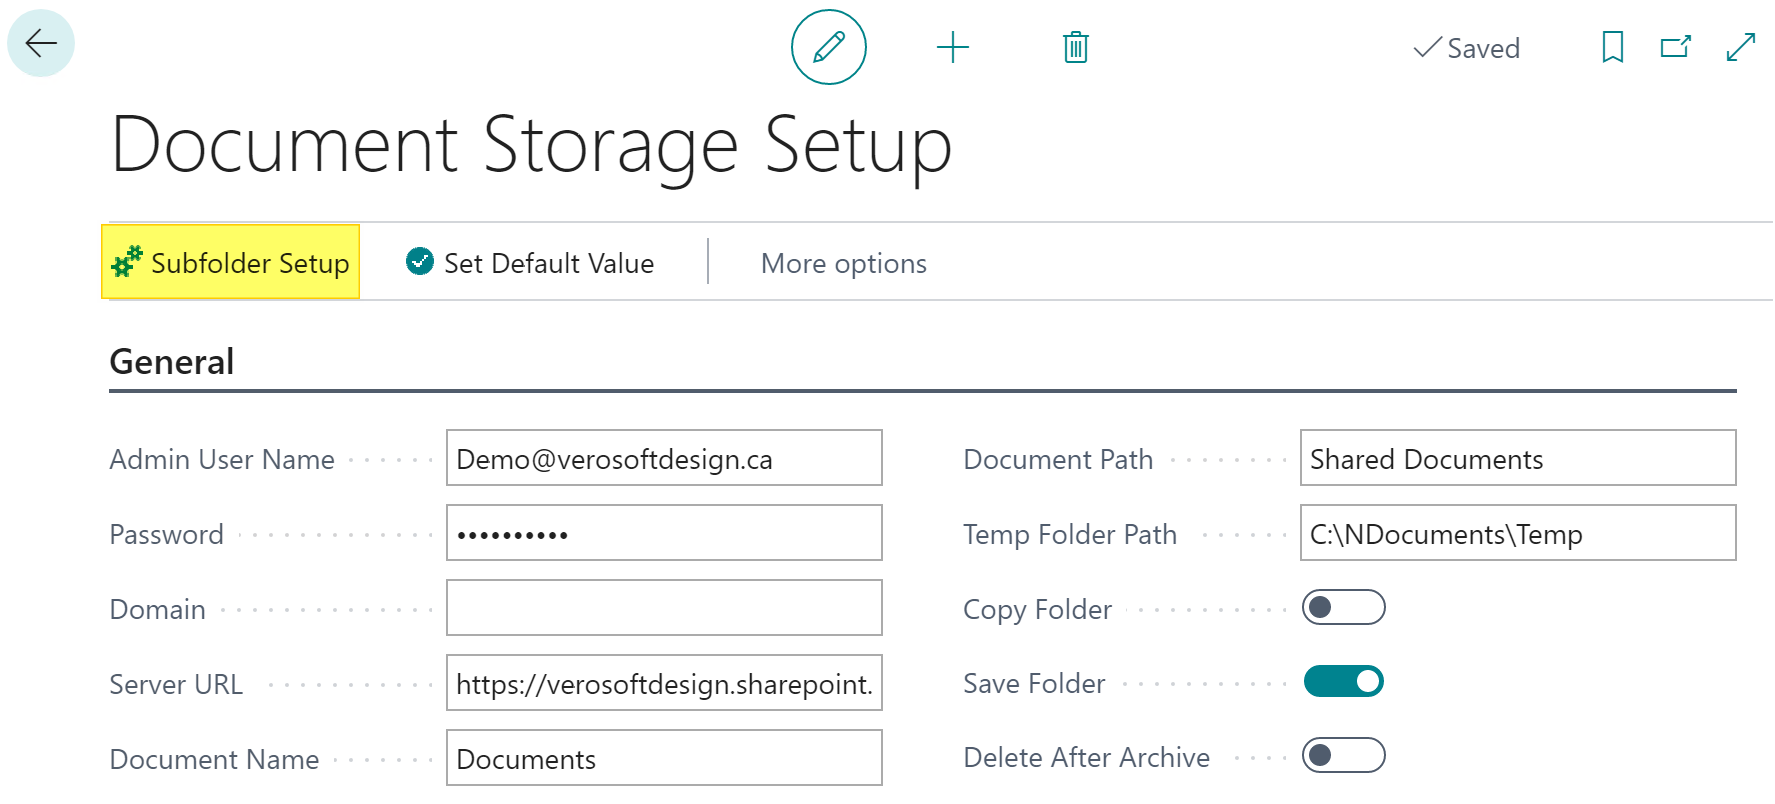
On the DocStash Setup page, you can set up the credentials, SharePoint URL and SharePoint document name.

A) Admin Username Add the admin username or email address of SharePoint here.
B) Password Add the password related to login from SharePoint.
C) Domain Add the domain name if it is required by the active directory.
D) Server URL Add the SharePoint destination URL where you want your documents to be uploaded.
E) Document Name SharePoint Document Name "User by Code". It is the location where folder and subfolder will be created.
It comes from inside SharePoint (In this example it is named "Documents" and highlighted in the yellow box).
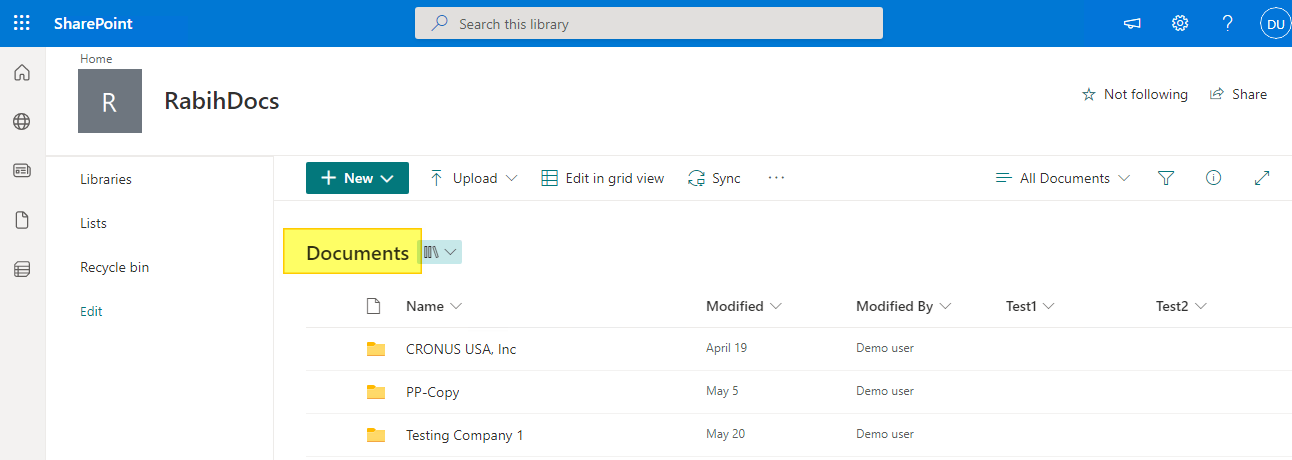
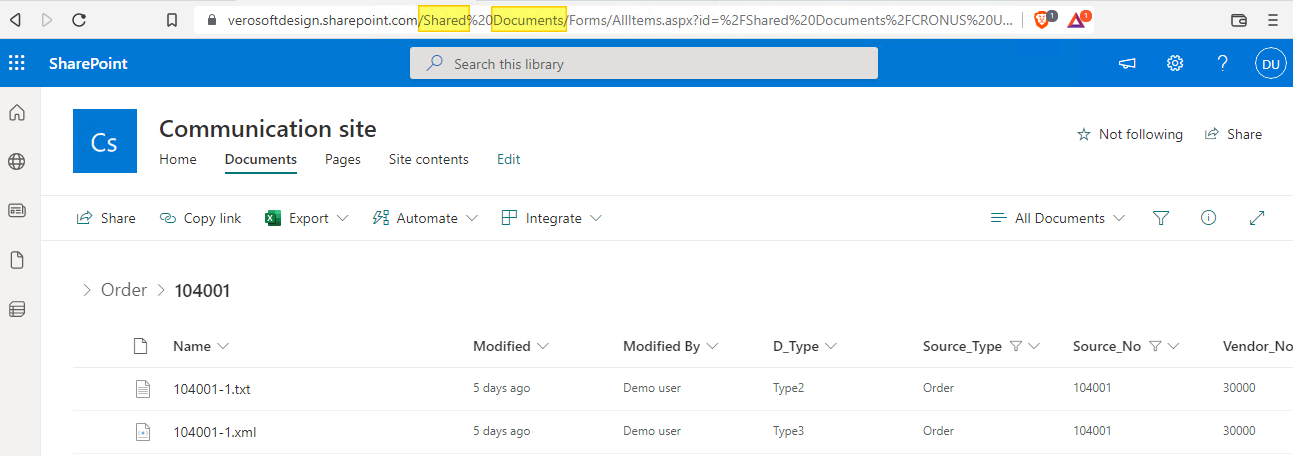
F) Document Path Add the SharePoint destination folder where you want documents to be uploaded. It comes from inside SharePoint URL (In this example it is named "Shared Documents" seen highlighted in yellow).
G) Temp Folder Path A URL of a temporary folder on the server used to upload files to SharePoint.
H) Copy Folder This option is used when you want folders on the unposted documents to follow the posted documents.
*Note - This should not be used if we are using one folder and filtering inside SharePoint.
I) Save Folder If a document is deleted in Business Central, such as a Sales Order, for instance, but you do not want the documents for that Sales Order to be deleted in SharePoint, you can activate the "Save Folder" toggle. You can deactivate the Save Folder toggle if you want your deleted documents from Business Central to also be deleted in SharePoint.
*Note - This should not be used if we are using one folder and filtering inside SharePoint.
J) Delete After Archive If the Delete After Archive toggle is activated, when a document is archived in Business Central, such as a Sales Quote that needs to be revised, for instance, all uploaded documents will be copied to the archive document, and the related folder Sales Quote is going to be deleted from SharePoint.
Pro Tip**: We recommend activating either the Copy Documents or Save Folder toggle to ensure you do not lose any documents. For instance, when you fulfill a sales order after invoicing and shipment are completed, the sales order is automatically deleted from Business Central. If you did not activate the Copy Documents toggle for the sales order document to be saved to an additional subfolder, such as "Posted Invoice" and did not activate the Save Folder toggle either, the sales order will be permanently deleted from both Business Central and SharePoint.
Subfolder Setup
On the Document Subfolder setup page, you can now start the mapping between Business Central and SharePoint folders.
When "Set Default Value" was clicked on DocStash Setup, it populated the Subfolder Setup page with Default Values.
To edit the Default Values, click on "Edit List".
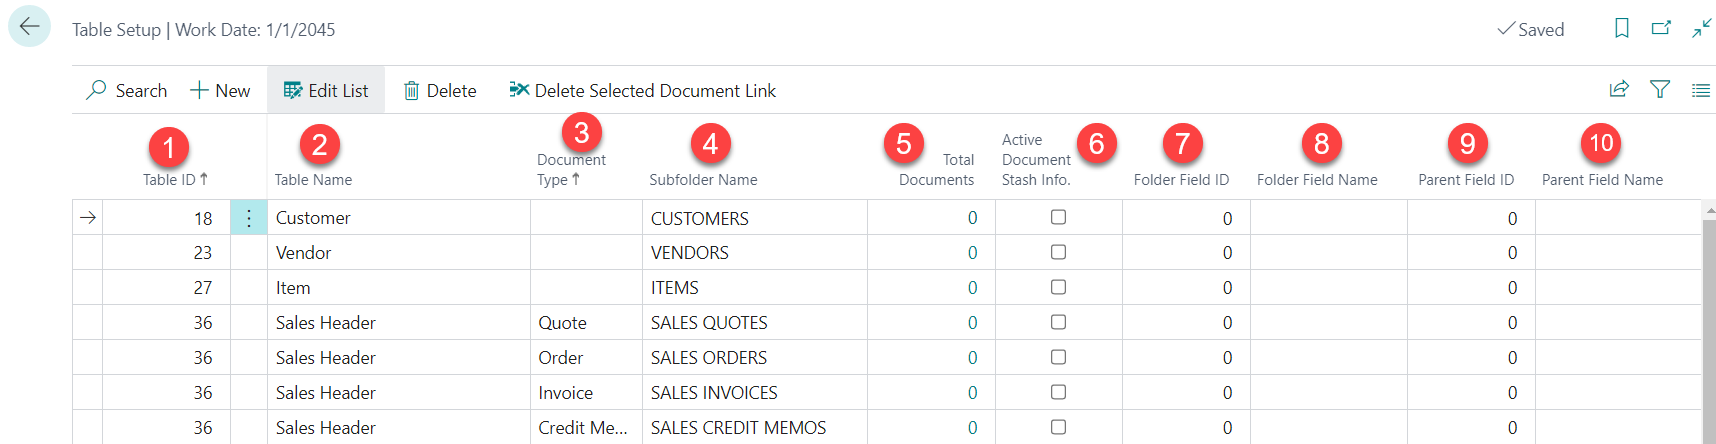
- Table ID: This is the table ID in Business Central.
- Table Name: This is the table name in Business Central.
- Document Type: Some Business Central tables have Document Types like Sales Header and Purchase Header, and it is part of the key.
- Subfolder Name: This is the default SharePoint subfolder directory from DocStash.
- Total Documents: This is the total of documents that were uploaded to SharePoint for a specific Business Central table. This is a field that is updated in real-time.
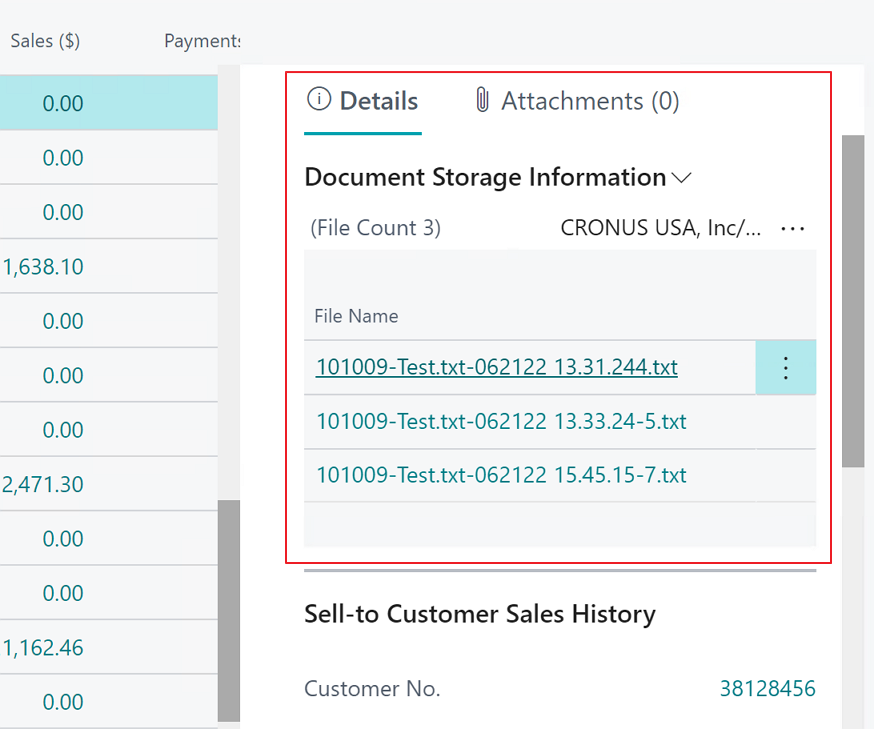
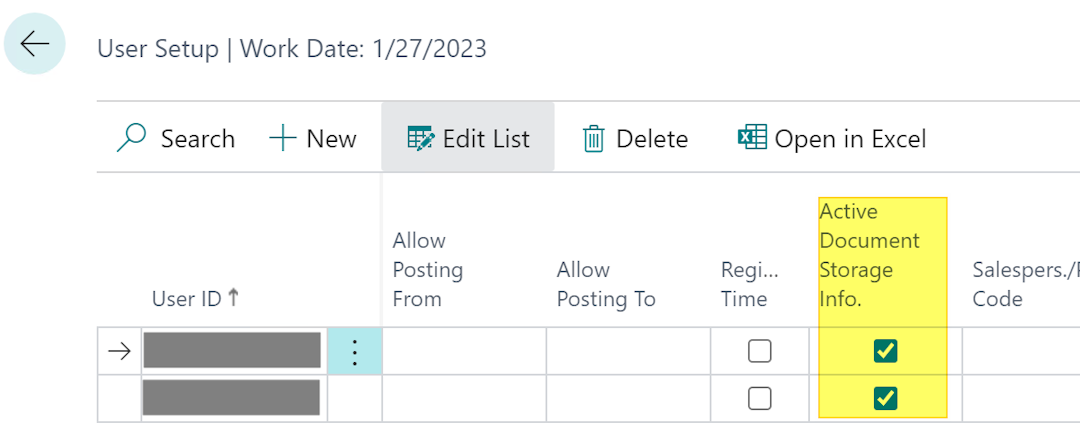
- Active DocStash Info: When this field is active (checked) DocStash information (seen in the red box) will show below "Details" on the page of the table ID. You also need to go in the User Setup page of your Business Central to specify which user can and cannot see DocStash Information by selecting the field "Active.DocStash Info".
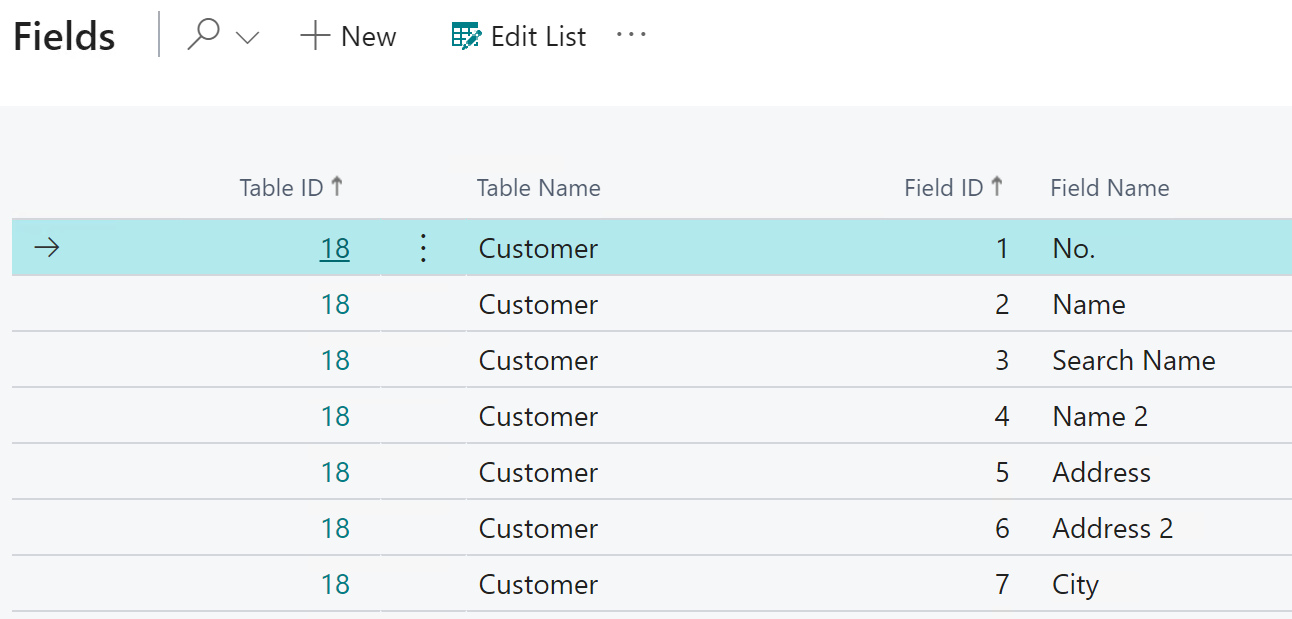
- Folder Field ID: This is where you can select the field ID found in the document folder name inside the SharePoint subfolder. For instance, you may want that every time you upload a customer document, the default folder name inside the specified SharePoint subfolder will be the customer number, so you would select the "No." field ID.
- Folder Field Name: "Folder Field ID" name.
- Parent Field ID: Used for hierarchy structure where available.
- Parent Field ID: "Parent Field ID" name.