Wormhole
Wormhole | Setup and Configuration
Getting Help in Business Central
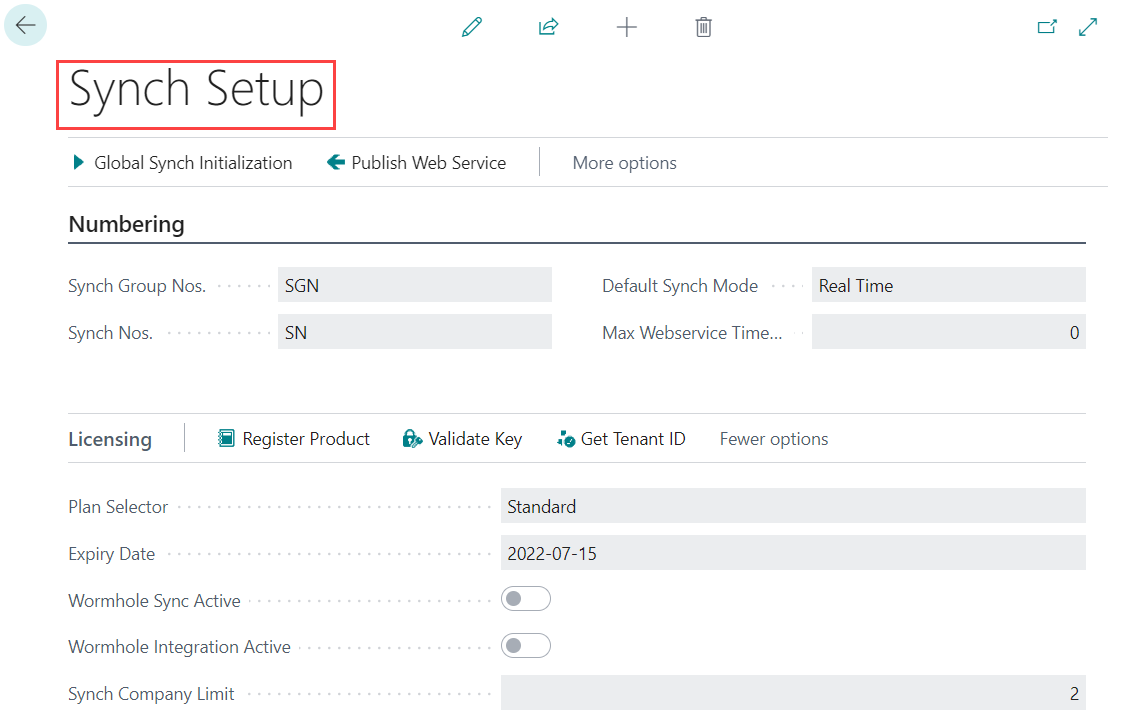
On every page related to Wormhole, you can press <Ctrl+F1> and a new tab will open within the related section of the Wormhole documentation.
For example, if you are on the Sync Setup page and you click <Ctrl+F1>, a new tab will open:
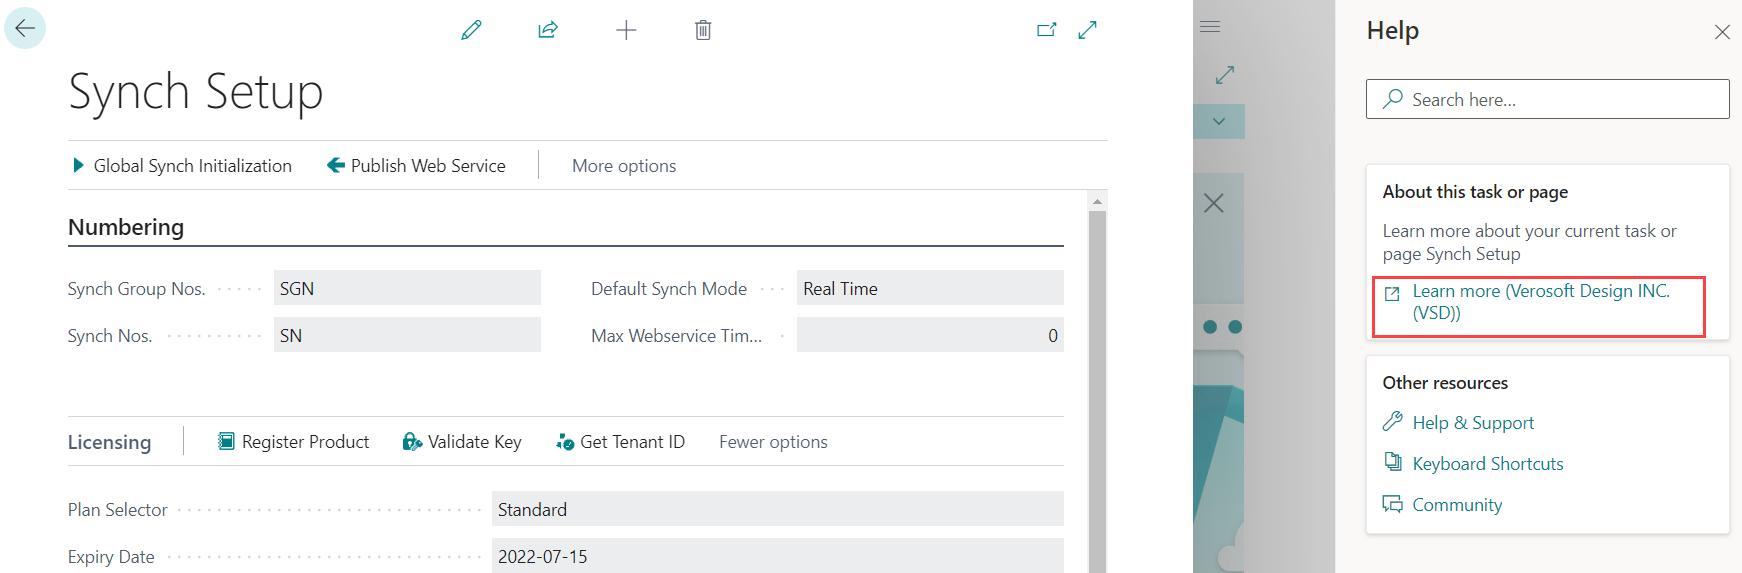
To receive help with a specific field, simply hover your mouse over the field and click on <Learn More>. A tab will open within the related section in the Wormhole documentation.
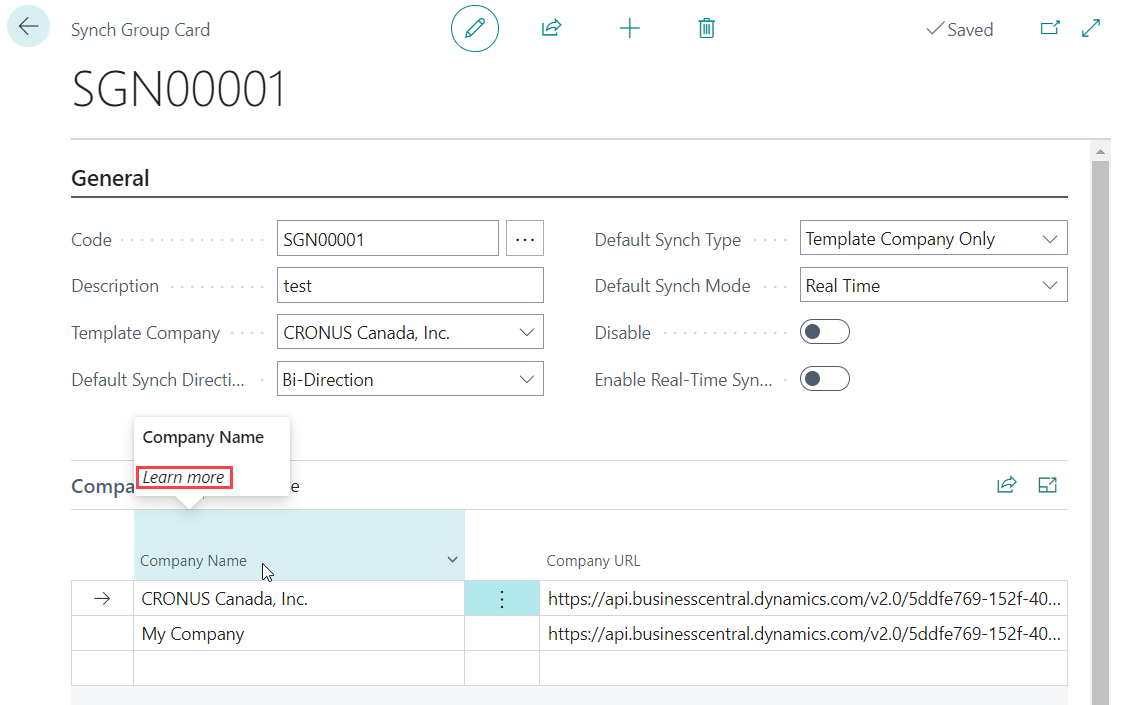
For example, if you are in the Sync Group Card and hover the mouse over <Company Name> and then click on <Learn More>, a new tab will open displaying the related information within the Wormhole documentation of Wormhole:
Initial Setup
First, you will need to grant consent of Azure Active Directory to Wormhole.
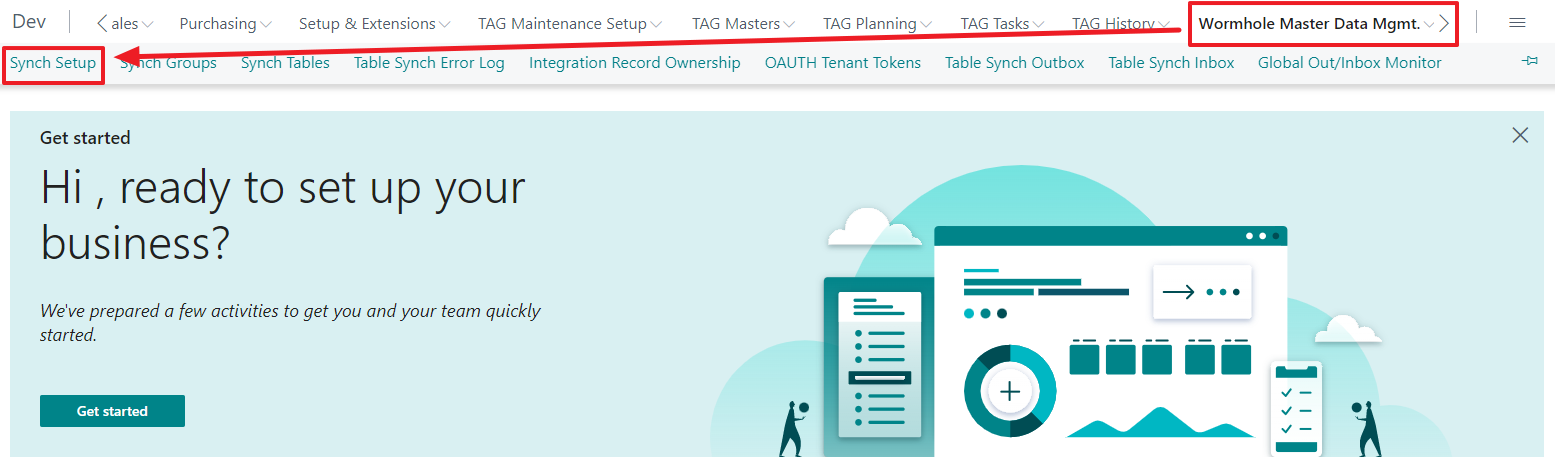
Step 1: Click on Synch Setup
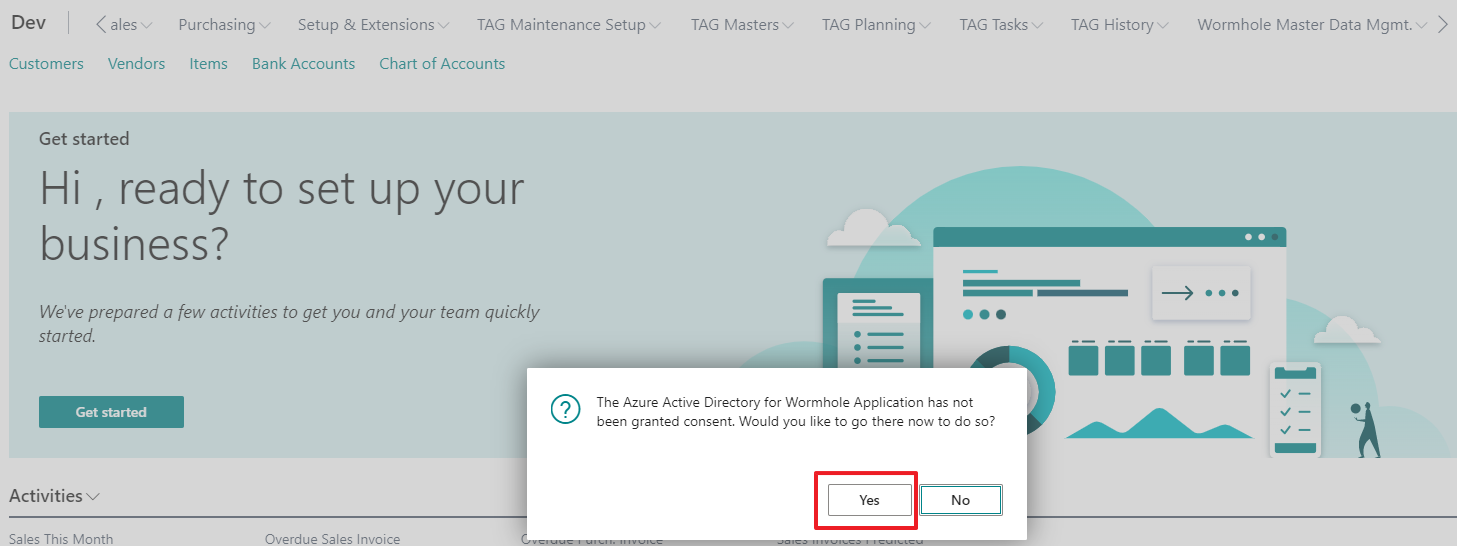
Step 2: A popup screen will open, click "Yes"
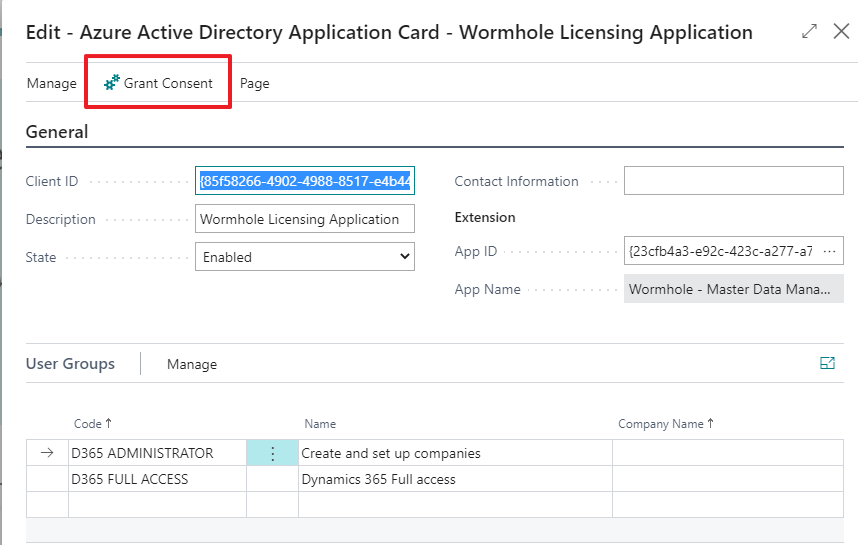
Step 3: Click on "Grant Consent"
Below is a list of the initial setup requirements:
- Sync Group Nos: Sync Group Number series (can be a manual or default series).
- Sync Nos: Sync Table Number series (should be a default series).
- Default Sync mode: Real-time or Inbox/Outbox (this is a default setting for the application but this can be changed at the Group or Table level).
- Max Webservice Timeouts: If using the Record Ownership or Compare Records function on large tables, you may need to increase the Web Service Time Out (0 value uses a default of 30 seconds, 30,000 milliseconds).
- Sync Companies: List of companies you would like to sync with the sync groups.
- Publish Web Service: Creates an entry for the web service code unit in the services tables and sets the status to "published" :
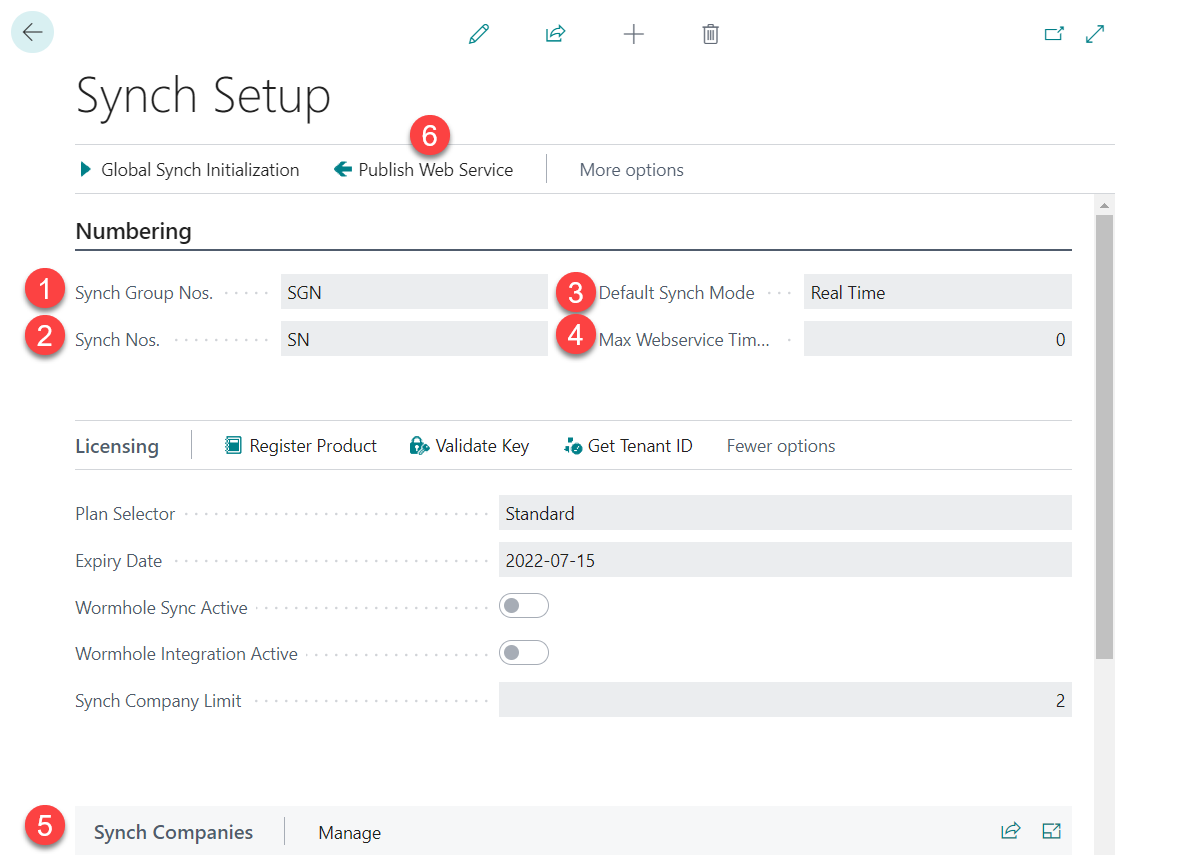
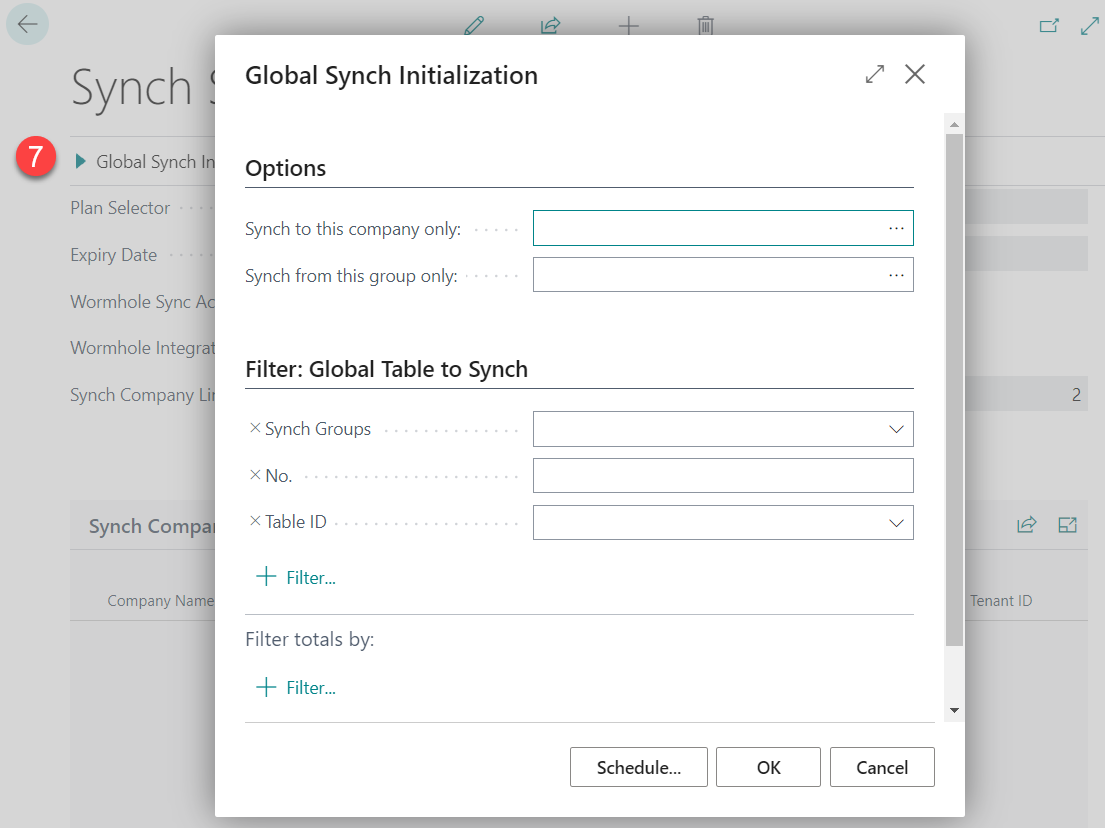
- Global Sync Initialization: Once Wormhole is setup, you can use this tool to do a one-time trigger of all records to be synced across all companies.
*Note: Initialization needs to be started from the company you want to sync from:
Wormhole Permission Sets
You may be required to import the Permission Sets and assign them to the allowed users before you start working with the Wormhole tool. Please follow the steps below:
Go to RapidStart/Configuration Packages and import the "WORMHOLE_PERMISSIONS" package.
The Super user needs to assign the proper Permission Sets depending on the Users functions:
- Administrator User: WORMHOLE_ADM: This Permission Set provides a user full access to global sync objects. This permission is assigned to a Wormhole Administrator who can create a Wormhole Setup.
- Transactional User: WORMHOLE_TRANS: This Permission Set should be provided to all users that are creating, modifying or deleting synced data.
Sync Setup Page
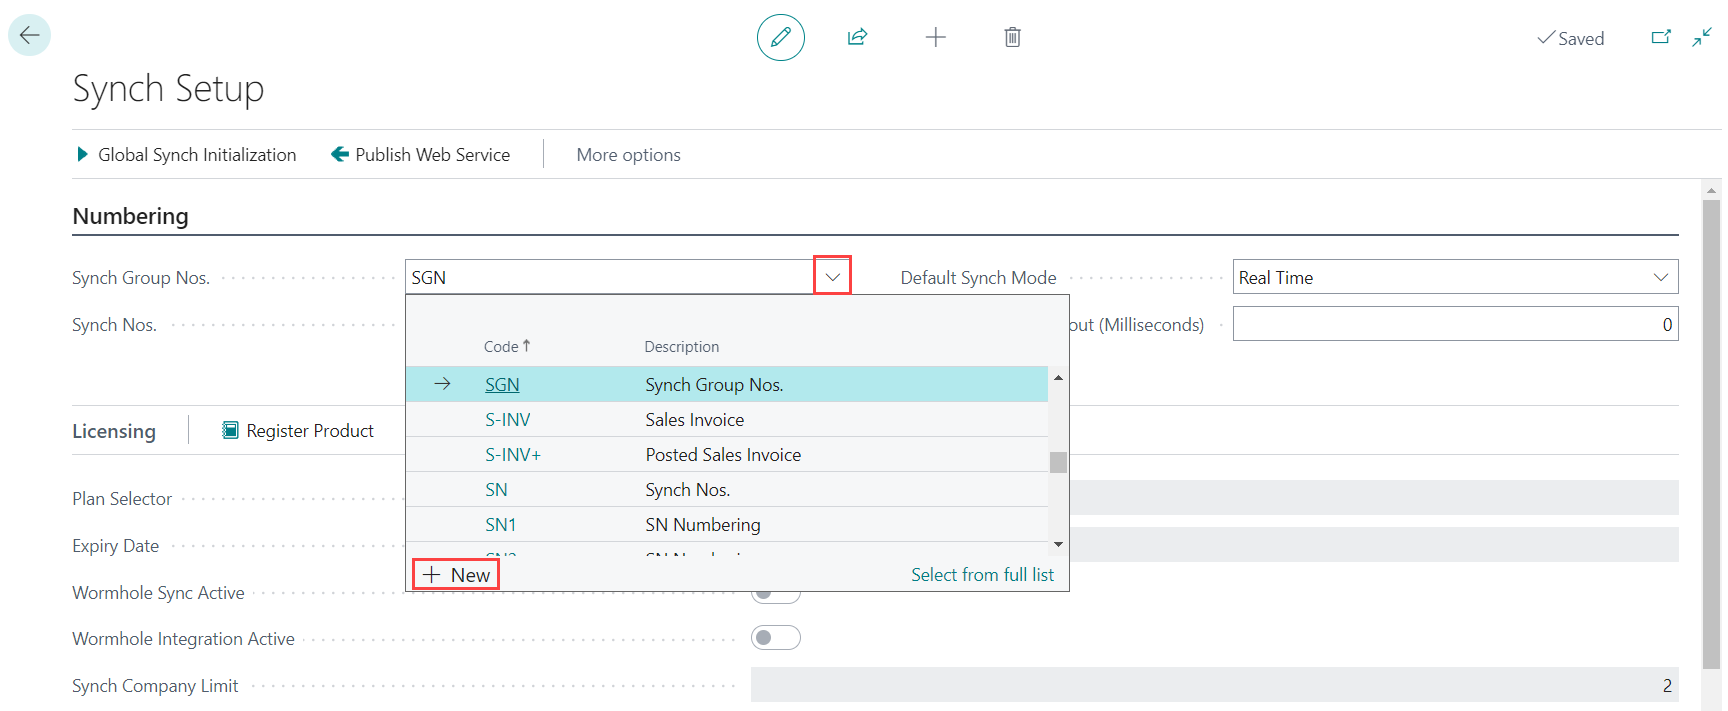
Sync Group Nos
Select the down arrow and click "New" to open the No. Series list:
- Enter the No. Series Code.
- Enter the No. Series Description.
- Defaults Nos: Select yes if you want the No. Series to be automatic.
- Manual Nos: Select yes if you want the No. Series to be manually entered.
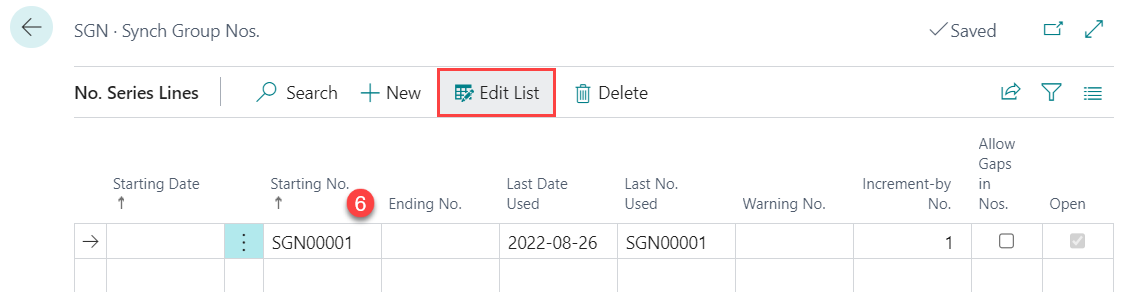
- Click on the Lines to define the structure of the No. Series:

- Starting No: Enter No. Series Starting No. and close page:
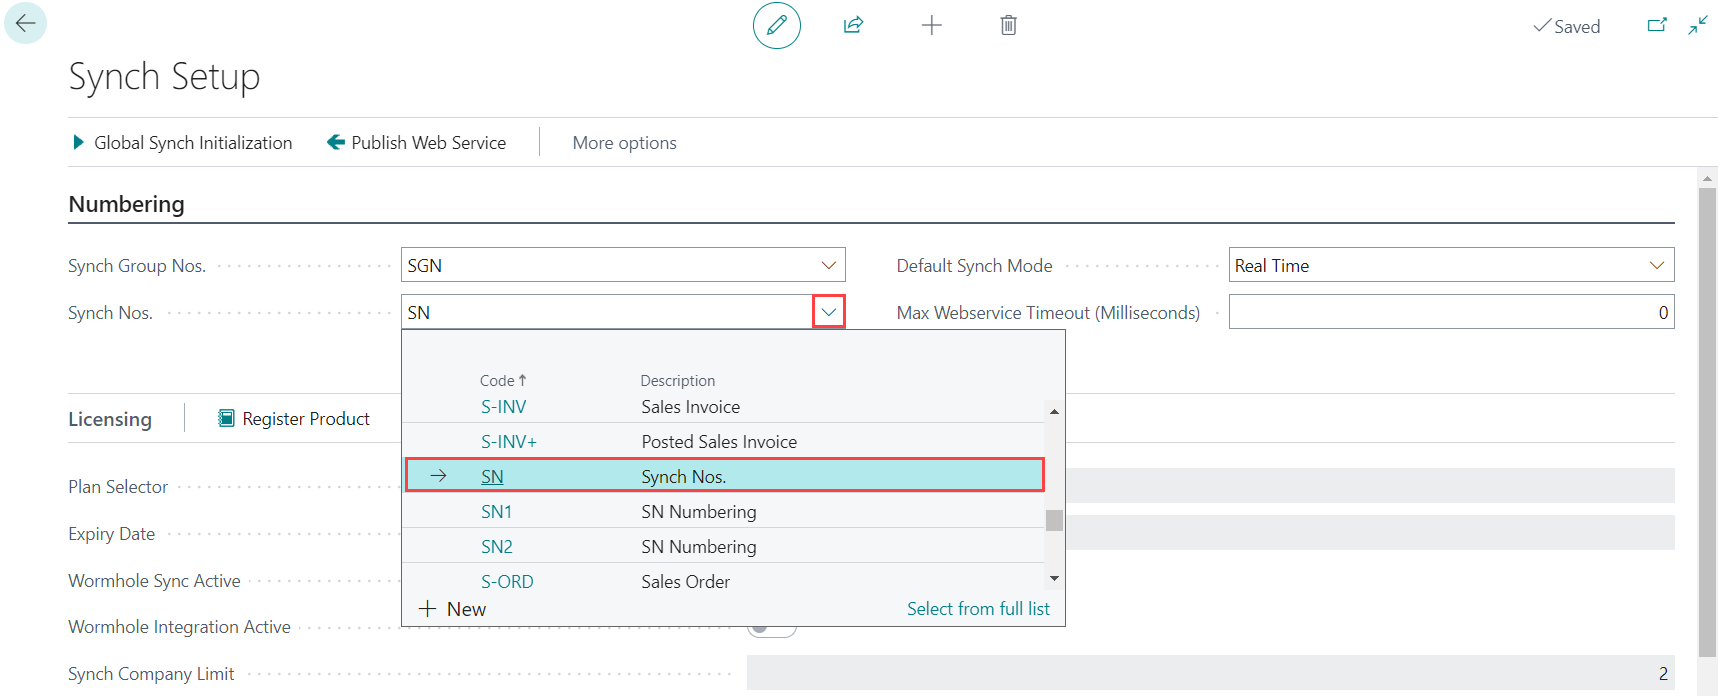
Sync Nos
Follow the same process as previous setup (Sync Group Nos.):
Note*: The No. Series in Dynamics BC are designed by company. We recommend defining the No. Series within the Template Company only (Parent company).
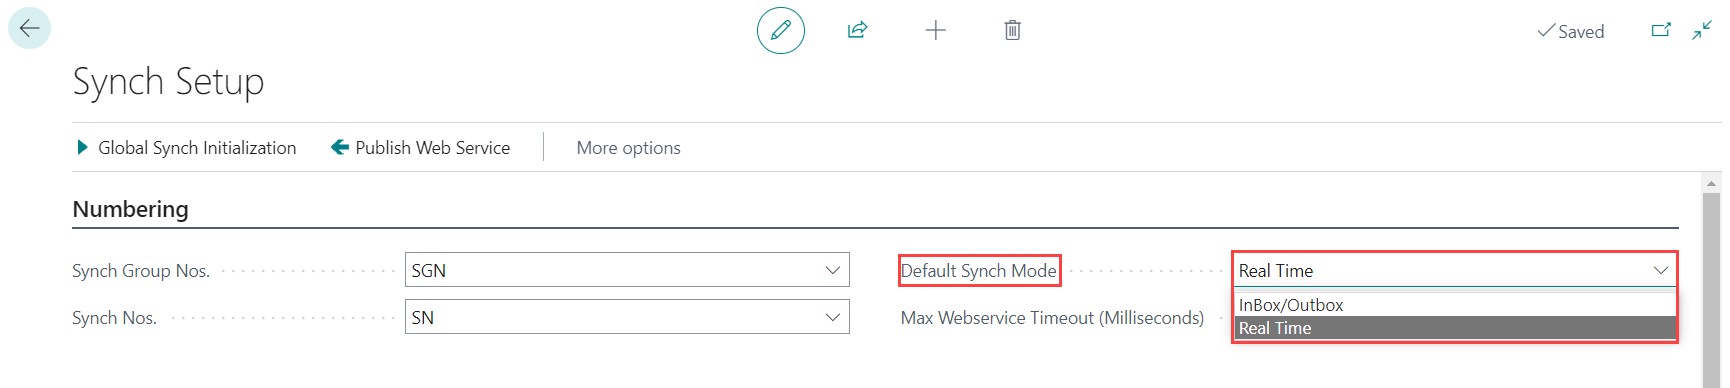
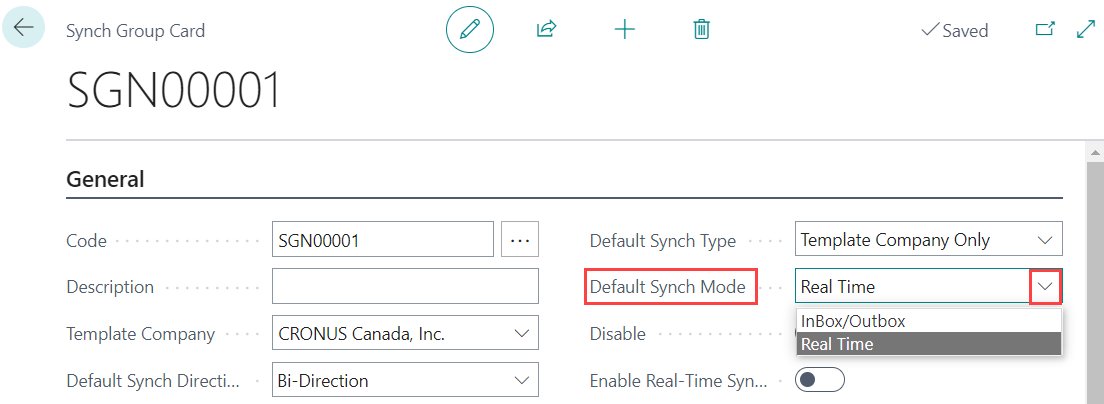
Select the Default Sync Mode:
- Inbox/Outbox: Synchronization through intermediate Inbox/Outbox process before getting the data on the destination companies.
- Real Time: Synchronization in real time without an intermediate step. (We recommend Real-Time unless you are working across multiple databases across a wide network. For syncing companies within a single database, you should use real-time synchronization unless you are syncing tables with extremely large volumes. You can improve performance by batching record changes).
*Note: Inbox/Outbox Mode can be automated by using the NAV Job Queues routine:
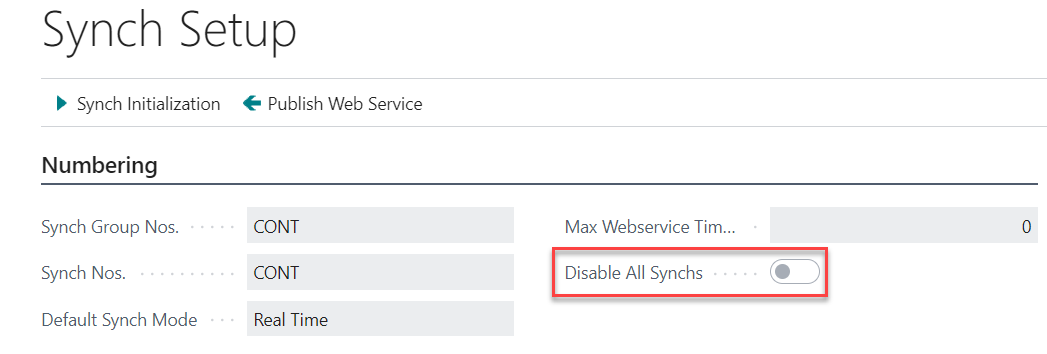
Disable Synchs
You now have the option on Sync Setup page to disable synchs. This prevents the creation of new synchs but does not block the processing of any existing Inbox/Outbox records.
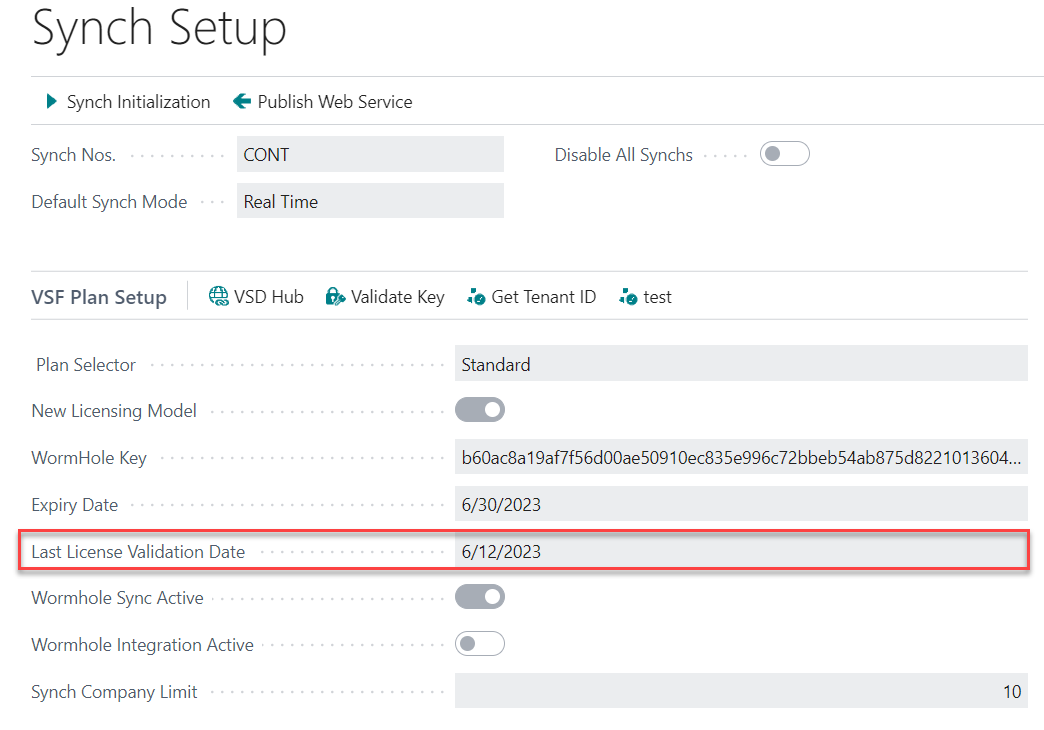
VSD Plan Setup (Formerly Licensing)
On the Synch Setup page, you can find the last License Validation Date:
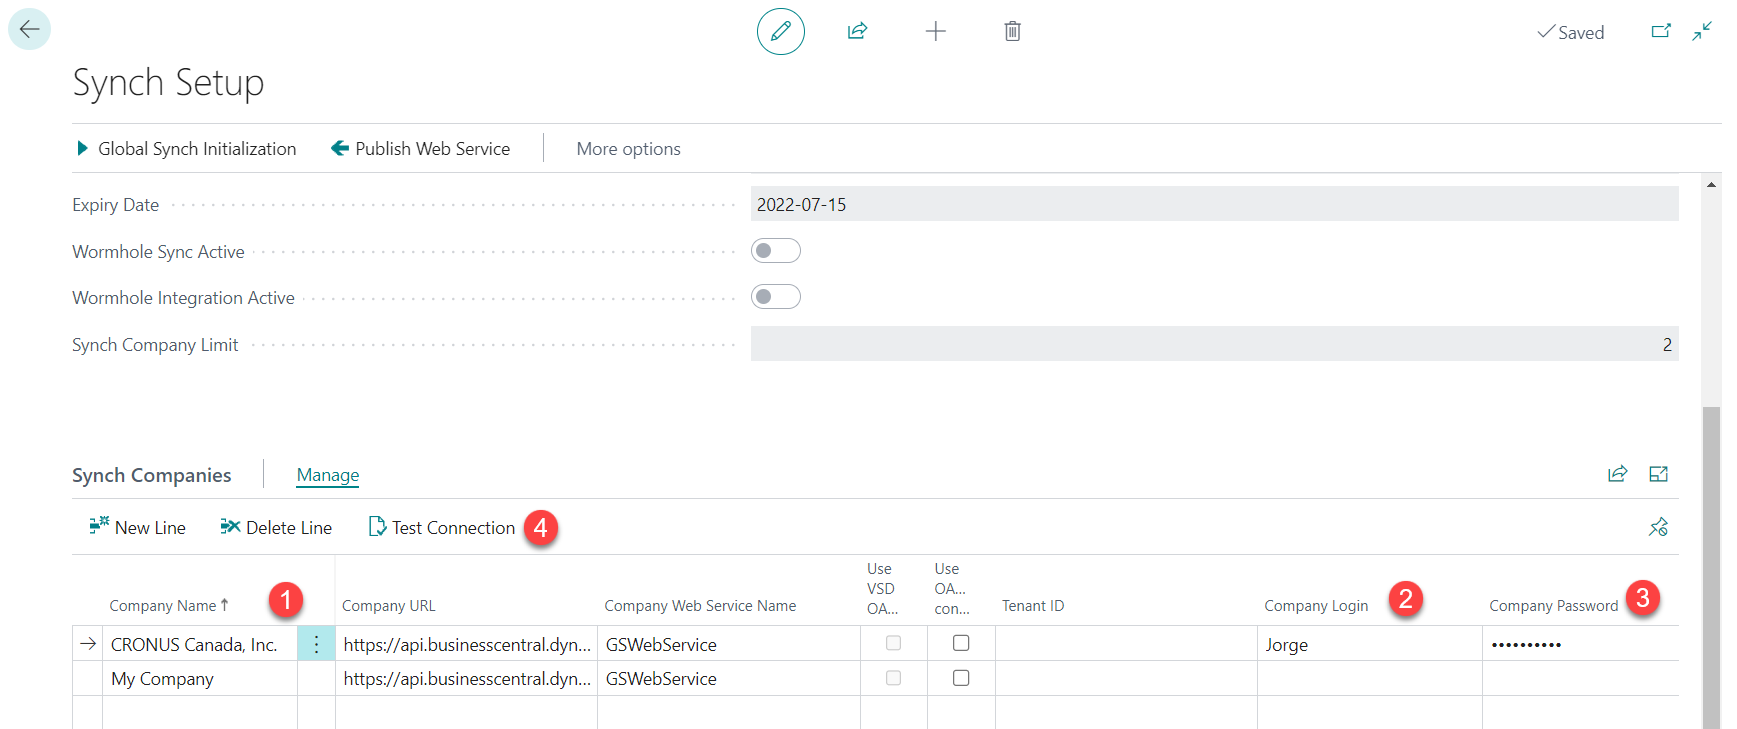
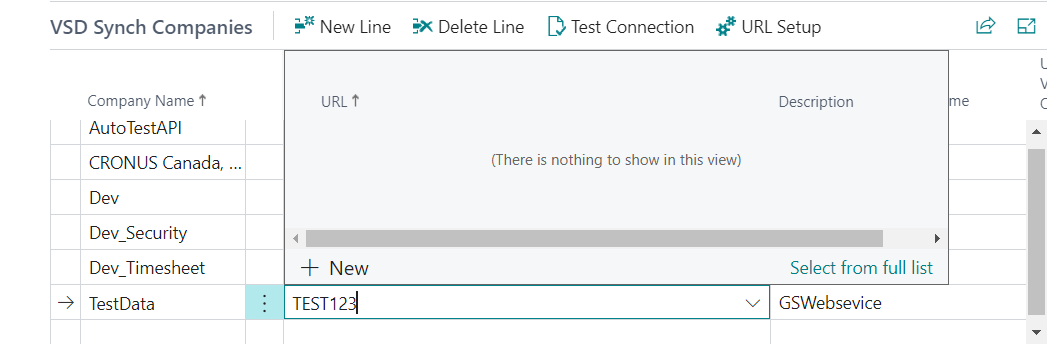
Sync Companies
Select a company list that you need to sync:
- Company Name: Select a company from the company list.
- Company Login: Define the user who can access and consume the Web Service.
- Company Password: Enter the password for the user who can access and consume the Web Service.
- Test connection: Add action for Test Connection to Sync Companies page. *Note: In docker environment, company URL auto-populated is not correct when selecting a company in the companies list:
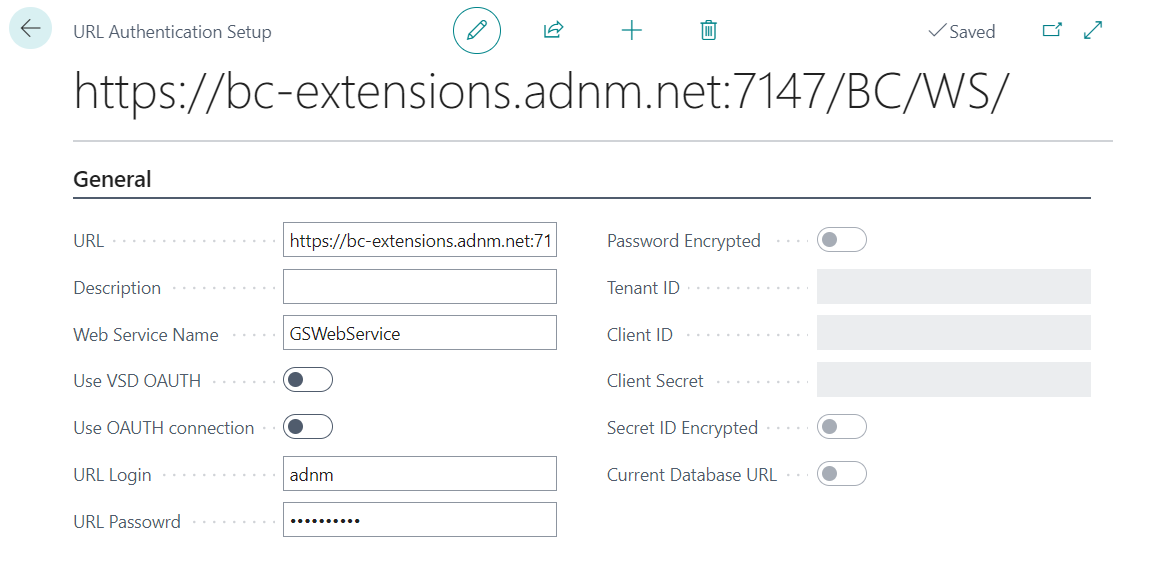
URL Authentication Setup
A. On the Synch Setup page, the related fields are not editable and are completed from the values in URL Authentication Setup.
B. With the URL Setup button, you can open the related URL Authentication Setup record for editing. Changes made will update all the Company Setup records that use the same URL.
C. List page for URL Authentication setups

D. Edit Card for URL Authentication
Sync Group Card Setup Page
Sync Group Setup
Sync Group is the core entity that allows you to define tables and fields that you need to synchronize between companies. Below are the steps:

Click on the "New" button to create one Global Sync Group:

Press on "Tab" in the Description field so that the system gives you the Code or you can enter it manually (Setup).
Select the Template Company: Global Company, which can receive the result of the synchronization:
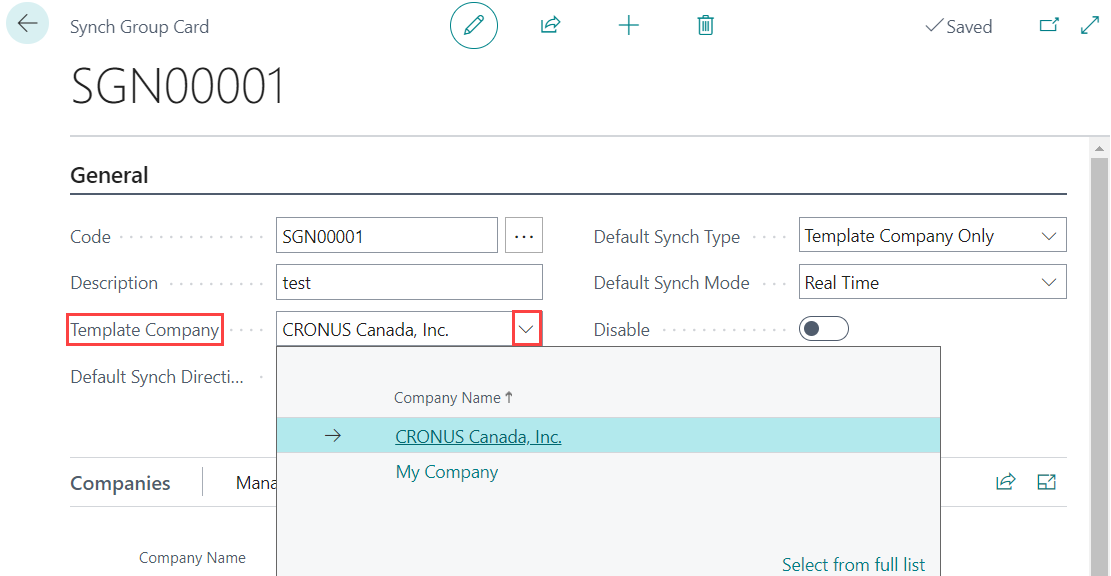
Select the Default Sync Direction:
- Bi-Direction: From any company to all companies in the Sync Group.
- Template to Company: From the Template Company to Child companies only.
- Company to Template: From Child companies to the Template Company only. *Note: You need to combine the Sync Direction and the Sync Type to define the global sync process. See Matrix below for combinations:

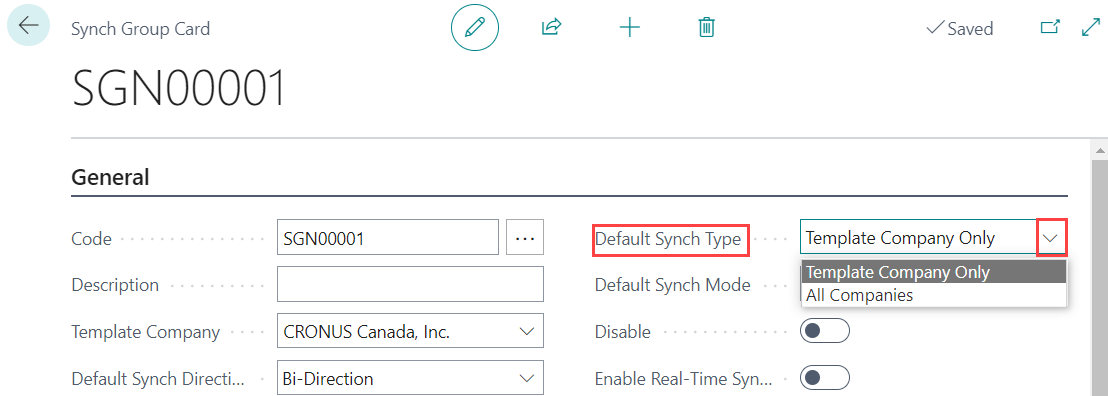
Select the Default Sync Type:
Template Company Only: Depending on the Sync Direction field, the Sync Type will affect the sync process. (See the table below.)
All Companies: Depending on the Sync Direction Field, the Sync Type will affect the sync process. (See table below.)
Note*: You need to combine the Sync Direction and the Sync Type to define the global sync process. See matrix below for combinations:
Synchronization Scenarios summary (combine Synch Direction and Synch Type):
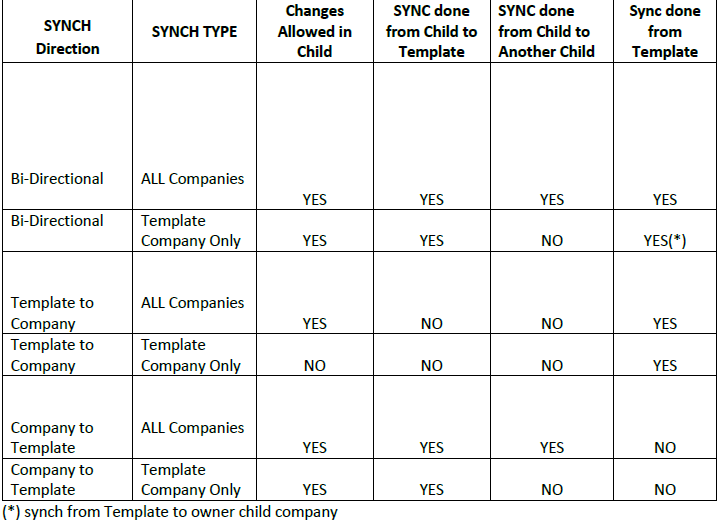
Example: T: is a template company, A and B are child companies. Create an item on A ==> item will be synced on T. Modify the same item on T ==> the changes will be synced only to A and not to B.
Note*: The Changes Allowed in Child column describes if the user can modify or not, the data (table fields) in a child company which are defined on the global sync group.
Inbox/Outbox: Synchronization will be done in a deferred time (intermediate step). Real Time: Synchronization will be done in real time:
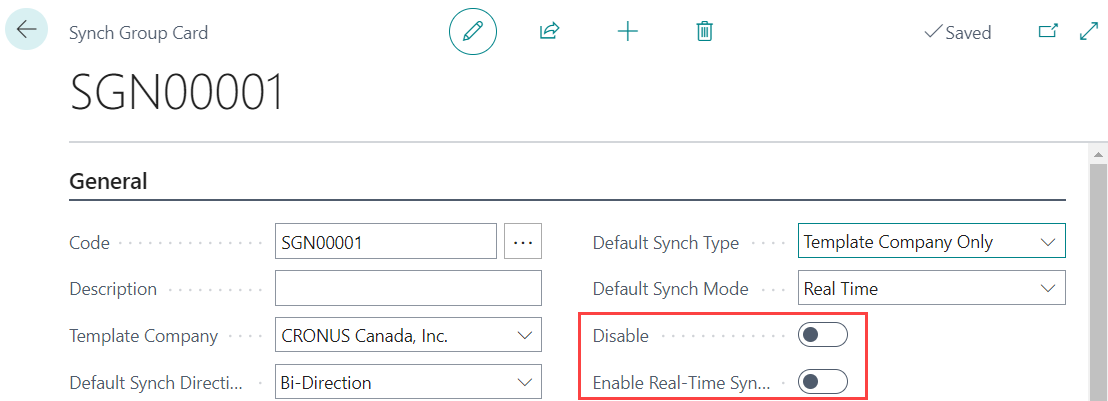
Disable: Option to completely disable the sync group directly from the header. Enable Real-Time Sync Error: Add option to throw Real-Time Sync Error instead of logging it. *Note: This option should only be used when syncing to one company:
Sync Companies
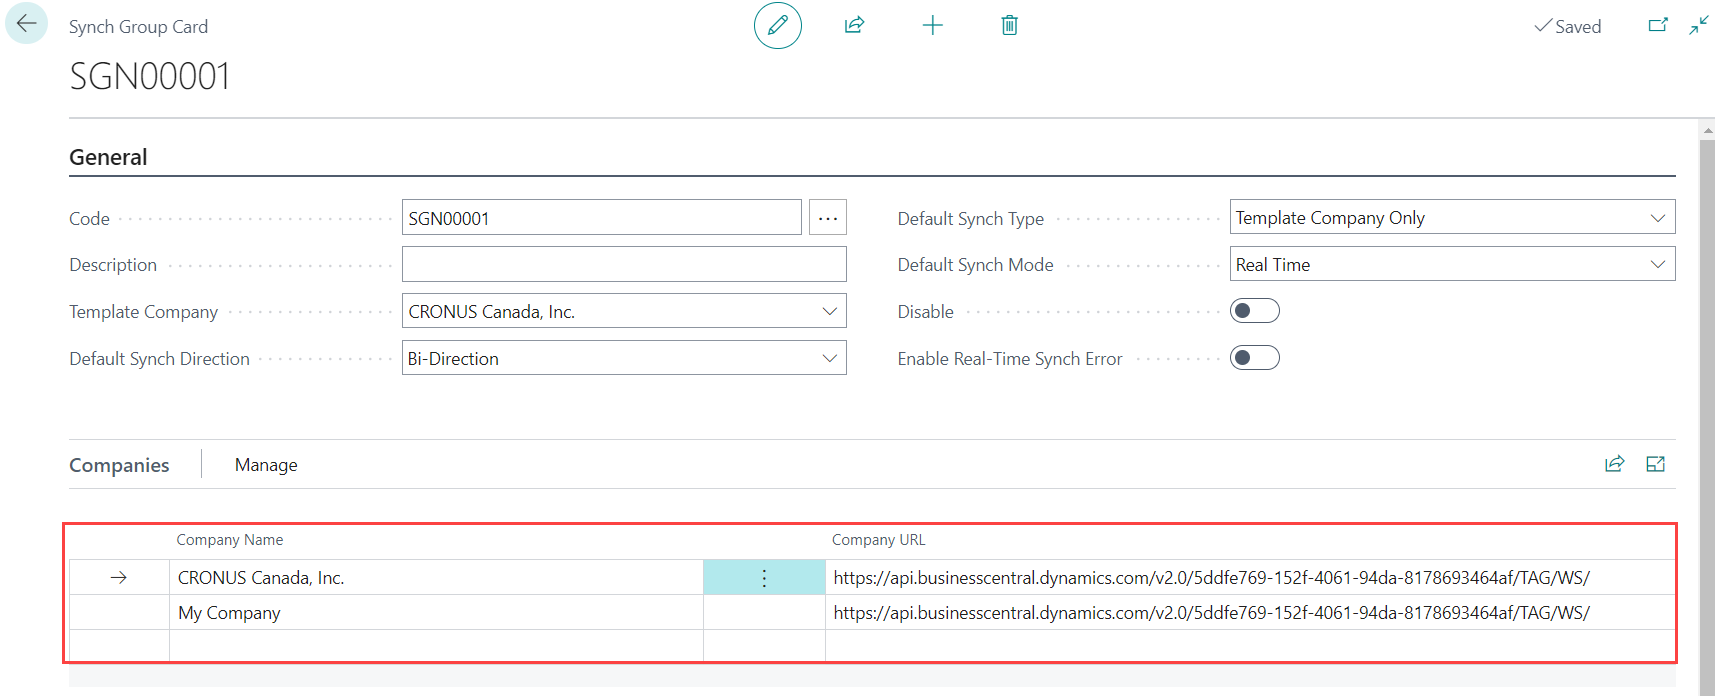
- Companies: List of companies that will be synced within that Sync Group.
- Company Name: Select a company name from a predefined company list.
- Company URL: This value will be populated from the predefined company list:
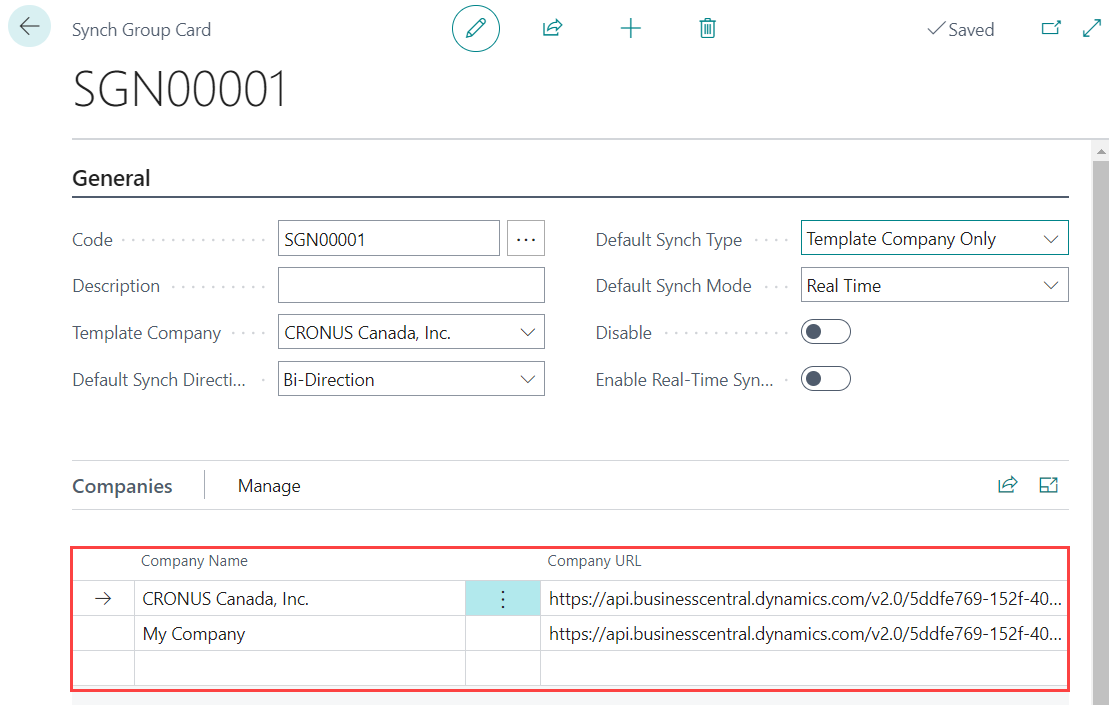
*Note: You need to define the Template Company among the company list to get the synchronization working. In the screenshot above, CRONUS Canada Inc. is defined as a Template company and at the same time is defined in the company list section.
Sync Table Setup
Once the required setup is done for the group, the next step is to define the tables that you need to synchronize on it. Please follow the steps below:
Go to the Sync Group page and click on "Manage" (1) and then "New" (2) to define tables, fields and filters:
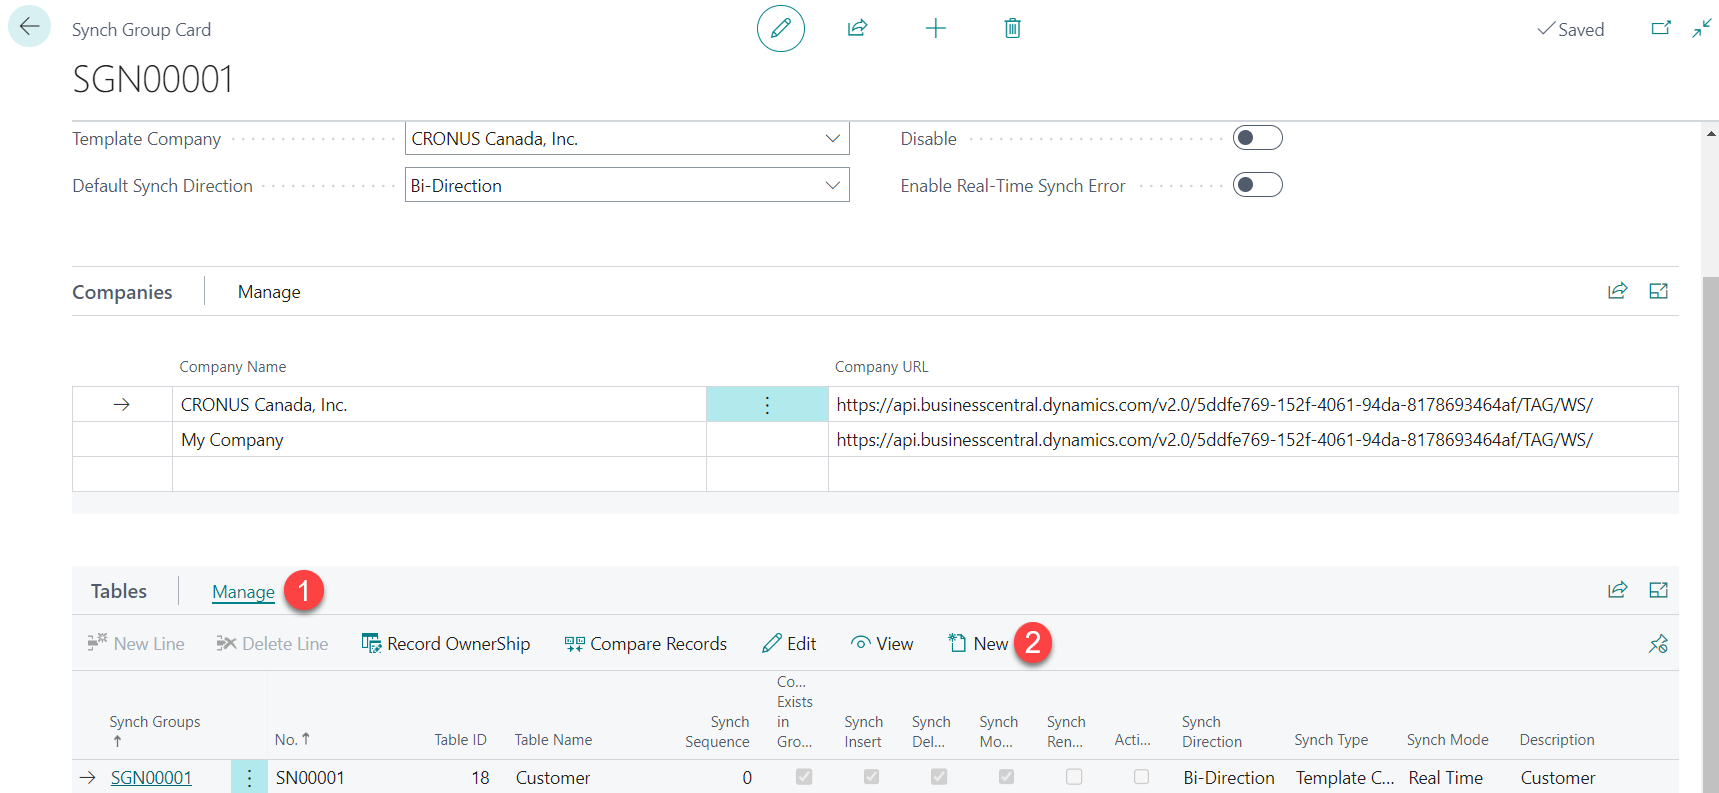
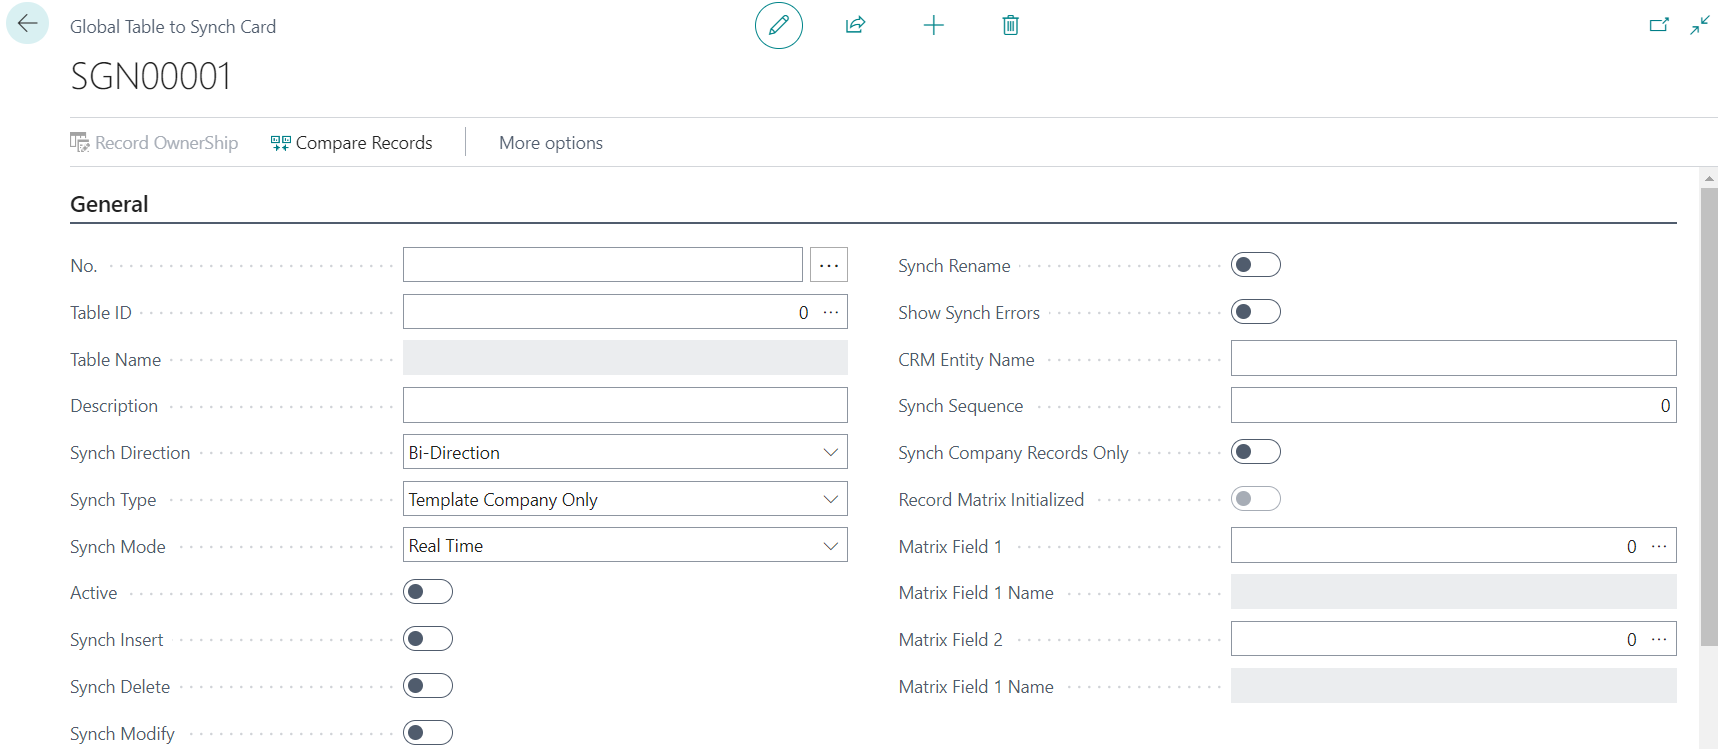
Click or Tab to the Table ID field to get the No automatically or you can enter it manually (depending on the Number series Setup):
- Table ID: Select the table ID.
- Table Name: Will be automatically populated based on Table ID field.
- Description: Table description.
Sync Direction (Will be defaulted from header, but can be modified on each table):
- Bi-Direction: Between Template company and child company and vice versa
- Template to Company: From Template company to Child Company only
- Company to Template: From Child company to Template Company only
Sync Type (Will be defaulted from header, but can be modified on each table):
- Template Company Only: Combined with Sync Direction to get the result. (See table below.)
- All Companies: Combined with Sync Direction to get the result. (See table below.)
Sync Mode (Will be defaulted from header, but can be modified on each table):
- Inbox/Outbox: Synchronization will be done in a deferred time. (intermediate step)
- Real Time: Synchronization will be done in real time.
- Active: Set to yes to activate the sync or No to deactivate it.
- Sync Insert: When a new record is created.
- Sync Delete: When a record is deleted.
- Sync Modify: When a record is updated.
- Sync Rename: When a primary key is updated.
- Show Sync Errors: Set to yes to store errors in the errors log journal.
- CRM entity name: Not currently used, can be left blank.
- Sync Sequence: Define this field if you need to define a specific sync order for tables.
- Sync company records only: Set to yes if you need to filter the sync by record value:
Sync Field Setup
This section allows you to define the fields you need to synchronize inside the related table:
Synchronize field:
- Ignore: This field will be ignored by the sync.
- Sync with Validate: Synchronize with data validation.
- Sync without Validate: Synchronize with no data validation:

Sync without Validate: Synchronize with no data validation. (There are rare instances where BC allows this. It is uncommon to use this option. Only use if absolutely required and if BC does not allow a field to update without validation as it will not work anyway):

Filter Field: You can define the filter for each field you need to synchronize:
Example:
Field Name: Description, Synch Filter: @bearings This means, only the items that have "bearings" within the description will be synced.

*Notes:
If images are going to be synced, verify the setting for "Max Message Size" in the NAV service. The default value of 1024 will probably not be large enough:

Limitation: Modify sync with table whose keys include date type field will get a message "error record already exists" when process inbox solution:
a. Sync it with Real-time mode.
b. Sync it with Inbox/Outbox mode, but need to set the data receiver's client's OS short date format to: MM/DD/YYYY .
DO NOT SYNC System updated fields like the "Last Date Modified" field. If you synchronize a field that BC updates automatically when a record is modified, it creates a conflict and you will get an error message: